

How to Carve a Welsh Love Spoon? ❤️

We offer you to learn to carve a traditional Celtic love spoon in 17 steps - perfect for beginners. The Celtic knotwork consists of «unders» and «overs». Where a line continues over another, this is the over. The line that comes to an abrupt stop is the under, it is usually the 'under' line that is carved away first.
Let’s begin!
What is a love spoon? What is its purpose?
Men have always confessed their love to women – 10, 100, and even 1000 years ago. Some wrote poetry, some gave flowers, and some confessed their love using gold. But the descendants of the Celts preferred to give their beloved a spoon, but not a simple one, but a carved one. When looking at the lovespoon patterns, the girl could understand what her boyfriend wanted to tell her, what feelings he had for her.
The love spoon is a wooden spoon with decorative patterns, a traditional gift with romantic intentions among the Welsh. It was usually carved with love symbols and ornaments to show the carver's skills. Thanks to their complex design, Welsh love spoons are used not only for their intended purpose but as exclusive and original interior items.
The oldest known Welsh love spoon dates back to the 1600s. Although, it is proved that this tradition arose long before that. From generation to generation, carvers added various decorative ornaments to spoons, and as a result, they lost their basic properties and became valuable custom-made accessories.

But there were times when wooden love spoons were carved by men with thoughts of their beloved ones. They were decorated with various symbols that had special meanings. For example, a bell meant a wedding; circles meant the number of children and a heart – love.
For those who like to approach any process with taste, who appreciates style and convenience during spoon carving, our multipurpose S13BOX Spoon Carving Set in a Box will be a perfect choice. You don't have to look for anything additional. Everything in our set is designed to teach you how to make a spoon out of wood. These all-inclusive sets have three varieties of knives, polishing compounds,wood spoon blanks, and leather strops. So your wooden spoon carving experience will be smooth and hassle-free.

The ultimate beauty of celtic love spoons
The culture and traditions of any nationality have many phenomena that are complex in their historical origin and functions. One of the most striking and revealing phenomena of this kind are Celtic love spoons.
Who and when decided to carve patterns on a wooden spoon and give it to his beloved is unknown. Some researchers believe that even 1000 years ago, there was such an original custom among representatives of the Celtic peoples. Therefore, the Love Spoon is often called Celtic or Welsh.

Essential tools and materials for carving a love spoon
If you're interested in carving a traditional Celtic love-spoon, there are a few tools and materials you'll need to get started. Here is a list of the essential items you'll need:
Tools:
- A carving knife;
- A gouge;
- A chisel;
- Sandpaper.
Materials:
- A block of wood (preferably a hardwood like oak or cherry);
- Pencil or pen for drawing your design;
- A ruler or straight edge for measuring;
- Beeswax or oil for finishing.
It's important to use high-quality tools and materials for this project, as the process of carving can be delicate and intricate. Consider investing in good-quality carving tools, as they will make the process much smoother and more enjoyable. Additionally, using a high-quality hardwood will ensure that your love-spoon is durable and long-lasting.
Carving love spoon step by step guide
Carving a Celtic Love Spoon is a wonderful and romantic way to express your love and admiration for someone special.
In this step-by-step guide, we will explore the process of carving a Celtic Love Spoon from start to finish, including the materials you will need, the tools required, and the techniques used to create a stunning and unique piece of art. Whether you are an experienced woodworker or a beginner looking for a new challenge, this guide will provide you with all the information you need to create a beautiful and meaningful gift for your loved one.
Step 1: Draw love spoon template

Firstly, transfer the design to the wood. Remember also to copy over the centerline, it will help to check that everything is aligned to the center. Hold your hand on the top half of the paper and slowly peel back the sheet to see if everything has been transferred. If not, let the sheet fall back into place and go over any missed sections and lines not easily seen.
Step 2: Rough Out the Spoon

Cut out the outside shape of the spoon. Use a scroll saw if you have one. In other cases use a handheld coping saw.
Step 3: Shade out the internal areas

Shade in the internal areas for removal as it easily identifies what needs to be cut out, and then please drill or carve the shaded areas.
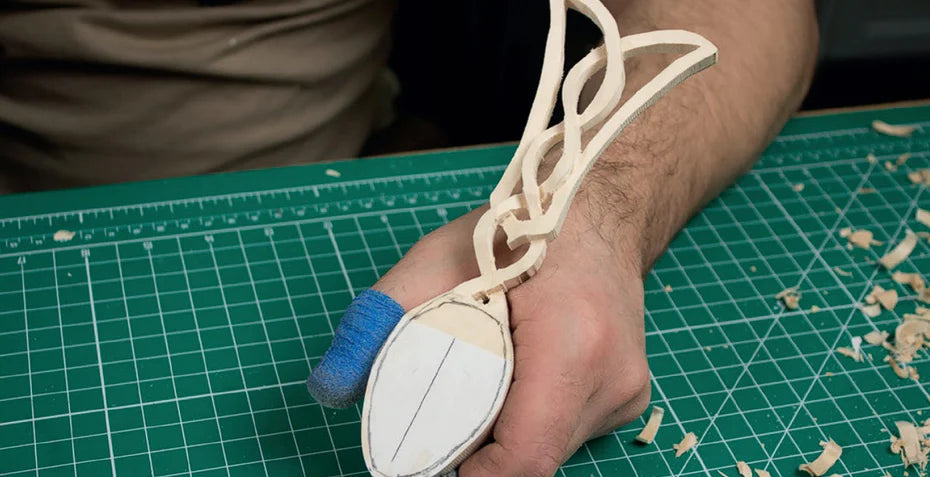
Step 4: Cut out inner areas
Remove the internal shaded areas by feeding the scroll saw blade into the drilled hole and then proceed to cut it out. Repeat for each shaded section until the spoon is the same design as the drawing or remove it with carving knife.
Step 5: Draw an outline of the spoon

Now you need to draw an outline along the side of the spoon to show what shape the finished spoon will be - this line is a guide only and can be changed as work progresses.
Step 6: Remove excessive wood

Now it is time to begin carving! Please do not carve the back/underneath until the top of the spoon is finished. Remove wood down to the line marked along the side.
Step 7: Make a stab cut along the spoon bowl

Redraw the lines back onto the spoon that was removed when shaping took place, and then make a stab cut along the spoon bowl. Allow a tolerance line - this line will be removed when you have the correct levels/shape. When you make a stab cut, ease pressure off as the chisel nears the baseline that is the line drawn on the side. In another case the unsightly cuts, if left, will look bad.
Step 8: Remove wood chips

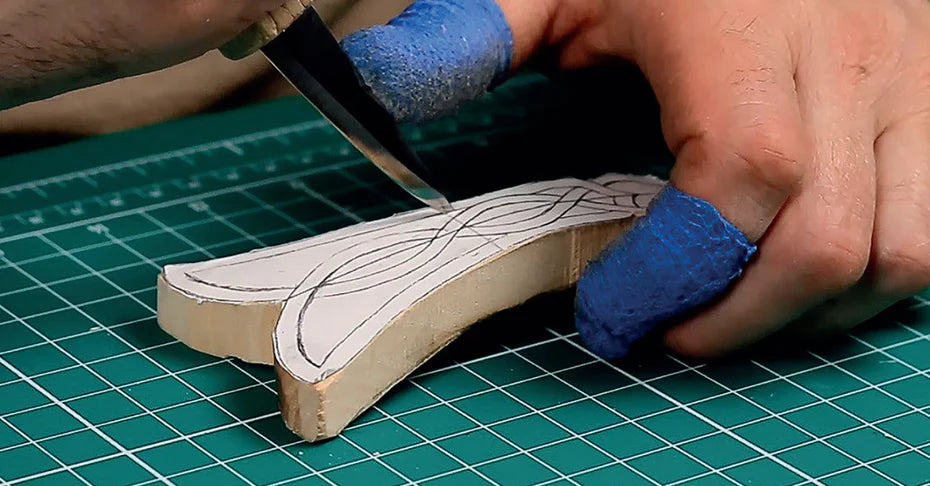
Make stab cuts on each side of the under/over lines and remove wood chips. Each cut will be angular and will need to be the same depth so that they look as if they will meet under the «over» line. Then continue with the remaining under/over lines. Please don't worry yet about the dotted line on outer edges.
Carving the heart
Step 9: Soften the angular lines

Now soften the angular lines once all the unders/overs have been cut, so that the Celtic knotwork appears as a nice continual and flowing line. These lines can be sloped over all the Celtic knotwork to give a camber effect.
Step 10: Remove wood at the base of the heart

As you work on the under/overs where the heart is, remove wood at the base of the heart first, please don’t forget to stab cut. That it allows the 'under' cuts on the Celtic knotwork to be done and to stand proud of the heart.
Step 11: Create a softening effect
The heart is rounded to give a cushioned effect by changing the angle of the gouge to take more away from the top of the heart down towards the back of the spoon. Be careful with the corner of the gouge, so that it won’t dig into the Celtic knot lines surrounding the heart.
Step 12: Remove extra wood out of bowl

Now you are ready to shape the bowl. Firstly, remove the wood so that the top of the spoon follows the line drawn along the side.
Step 13: Hollow out the bowl

For hollowing out the bowl, draw a line approximately 2-3 mm in from the edge of the bowl as a tolerance to reshape the bowl if the shape is not right. Please do not stab cut this line. Try to work with or across the grain. It would be better to use a long bent chisel for hollowing out the bowl. When satisfied with the overall shape, tidy up all areas that need it.
Step 14: Shape back of the spoon

Now we are going to begin to shape the back of the spoon. It is a great idea to use a clamp and some offcuts of wood for support under the curved areas as it will be difficult to carve, because the top surface, which now rests on the bench, is not flat.
Step 15: Shape the back of the spoon bowl

Now let’s start to shape the back of the spoon bowl - this is done in the same way as shaping the heart, i.e. by changing the angles of the chisel to remove wood.
Step 16: Tidy up unsightly cuts

Tidy up any unsightly cuts using a knife, chisel or scraper. The scraper is very useful in the bowl of the spoon.
Step 17: Sand the love spoon

The next process is to sand the lovespoon. We should admit that not everyone likes a sanded finish so if you do not intend to sand, then the cuts need to be clean. If sanding, the crisp lines need to be maintained. In this case, it is a good idea to use double-sided Sellotape to stick sandpaper to offcuts of wood, wax modeling tools etc, so that consistent pressure could be applied. Please make sure internal areas are also sanded.
It's all about details: wooden spoon with heart cut out
As the spoon starts to take shape and you start rounding off some of the straight lines in the blank, you can add some details. For example, create a wooden spoon with a heart cut out. A spoon with a heart-shaped paddle for a decorative finish will become a refined handmade gift for weddings, engagements, and birthdays symbolizing love, kindness, and fidelity.

Features of celtic wood carvings
Some say that Celtic wood carvings are distinguished by the severity of style. However, the richness of the varied and intricate motifs sets these carvings apart from all others.
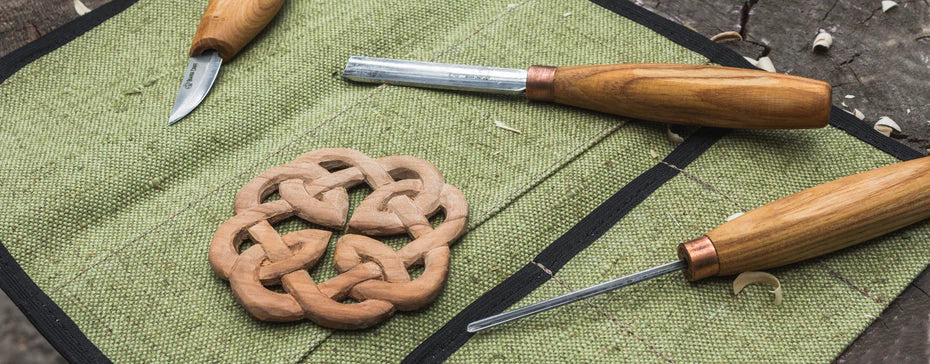
If you're just trying out Celtic wood carvings and are afraid of making the mistake of carving the shape of a spoon and wasting your wood, order our Deluxe B1 Spoon Carving Blank to help you out with your whittling project. Our spoon blanks are made from low-density wood (linden) and are suitable for the easy and hassle-free carving of spoons of various designs and patterns.

To Sum Up
The speakers of the authentic Celtic language disappeared from the Planet a long time ago. But their tradition of confessions has survived to modern times.
Valentine's Day is on the way... So, why not try your hand at carving Welsh love spoons and creating the perfect gift for your loved one? Don't be afraid to improve your skills. With quality and durable tools and supplies from BeaverCraft, you will be able to perform any project you like!
How to carve a welsh love spoon FAQ
What is a Welsh love spoon, and what is its history?
A Welsh love spoon is a wooden spoon that has been intricately carved with symbols and designs that represent love and affection. The tradition of carving love spoons dates back to the 17th century in Wales, when young men would carve spoons as a token of their affection for a sweetheart.
What kind of wood is best for carving a Welsh love spoon?
The best wood for carving a Welsh love spoon is a straight-grained hardwood such as cherry, walnut, or maple. The wood should be dry and free of knots or defects that could make carving difficult.
What tools do I need to carve a Welsh love spoon?
To carve a Welsh love spoon, you will need a few basic tools, including a carving knife, a gouge, a V-tool, and a saw. You may also want to use sandpaper, a rasp, or a file to smooth and refine the surface of the spoon.
How do I carve a traditional Welsh love spoon?
Carving a Welsh love spoon requires patience, skill, and attention to detail. Begin by sketching your design onto the wood with a pencil, and then use your tools to carve away the excess wood and create the shapes and patterns of your spoon. Take your time and work carefully, checking your progress frequently to ensure that you are staying on track.
Author:

Roman Law
Wood carving guruFrom a childhood enchanted by nature, my passion for wood carving guided me on a path of creativity. With a pocket knife, I uncovered the transformative power of my hands, breathing life into driftwood and forging a lifelong connection with the medium.
1 comment
-
Posted on by Karen jonesJust started carving and found very helpful