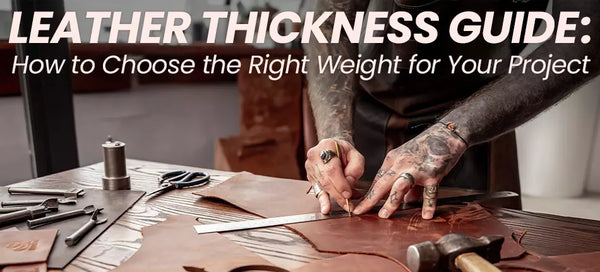
Learning how to make a leather wallet is an excellent introduction to leatherworking. A small wallet combines several essential skills in one manageable project: measuring, cutting, preparing edges, assembling layers, punching stitching holes, and sewing by hand. Unlike larger leather accessories, a simple wallet requires relatively little material, making it a practical choice for beginners who want to develop their technique without committing to a complicated construction.
One of the advantages of making leather wallet projects by hand is that you do not need a sewing machine or a professional workshop. With suitable leather, a few basic tools, and a carefully prepared pattern, you can produce a functional accessory at home. The process also teaches you how leather behaves when folded, glued, stitched, and finished - knowledge you can apply to future leathercraft projects.
This guide focuses on a minimalist two-pocket card wallet. It is a straightforward design that allows you to practise the complete construction process without dealing with zippers, hardware, complex folds, or numerous overlapping layers. If you are completely new to the craft, the leatherworking guide for beginners provides a useful introduction to the fundamental techniques before you begin.
What Type of Leather Wallet Should You Make First?

Not every wallet design is equally suitable for a first project. The number of components, pocket arrangement, thickness of overlapping layers, and length of the stitching lines all influence the difficulty of construction. A design that looks simple from the outside may require precise skiving, complicated folding, or several separate stitching operations.
For beginners, the best approach is to choose a wallet with a limited number of pieces and clearly defined seams. This makes it easier to identify mistakes, adjust the pattern, and understand how individual components work together.
|
Wallet Type |
Construction |
Difficulty |
Best For |
|
Simple card holder |
Two or three pieces with straight seams |
Beginner |
Learning cutting, alignment, and saddle stitching |
|
Minimalist wallet |
Compact construction with several card compartments |
Beginner to intermediate |
Practising pocket placement and layered assembly |
|
Classic bifold wallet |
Folding body with multiple interior pockets |
Intermediate |
Developing folding, skiving, and more advanced construction skills |
For this tutorial, we will make a compact card wallet using one rectangular back panel and two smaller front pockets. Each pocket is attached along its outer side and bottom edge, leaving its upper and inner edges open for inserting cards. The pockets sit side by side, creating a symmetrical layout with two accessible compartments.
The finished wallet will measure approximately 105 × 75 mm (4.13 × 2.95 inches). It is designed primarily for standard payment cards rather than unfolded banknotes. Its simplicity makes it ideal for practising accurate stitching and edge finishing while producing an accessory suitable for everyday use.
Once you are comfortable with this construction, you can experiment with additional pockets, different leather thicknesses, rounded corners, or a folding design. However, completing one straightforward wallet carefully is more valuable than attempting an unnecessarily complicated first project.
What Leather Is Best for Making a Wallet?
Choosing suitable leather is one of the most important decisions in wallet making. The material must be flexible enough to accommodate cards while maintaining sufficient structure to prevent the wallet from becoming loose or distorted during use. Thickness, firmness, surface finish, and edge characteristics all affect the finished result. For your first diy wallet leather project, choose a material that is easy to cut, flexible enough for card pockets, and firm enough to maintain the wallet's shape.
For a first handmade wallet, vegetable-tanned leather with a relatively firm temper is a practical option. It generally offers predictable cutting and can develop clean, burnished edges when properly prepared. However, not all vegetable-tanned leather behaves identically, and some pieces may be too stiff or thick for a compact wallet.
Chrome-tanned leather is another option, particularly when a softer and more flexible wallet is desired. It is often comfortable to handle and available in many finishes, but soft varieties can stretch during assembly and may require a different edge-finishing method.
When selecting leather for wallet making, consider the relationship between individual layer thickness and the overall construction. A material that feels thin when handled separately may create considerable bulk when several pieces overlap.
For the two-pocket design described here, approximately 1.0-1.2 mm leather is a reasonable starting point for the back panel, while 0.8-1.0 mm leather can work well for the pocket pieces. These are practical guidelines rather than fixed requirements. The appropriate thickness depends on the leather's firmness, the intended card capacity, and the desired appearance.
A pocket made from 1.0 mm leather attached to a 1.2 mm backing creates approximately 2.2 mm of leather thickness along the overlapping edge before accounting for adhesive, thread, and any local compression. Using unnecessarily thick leather can make the seams bulky and reduce the available space inside the pockets.
For a detailed explanation of leather weight, measurement units, and how multiple layers affect construction, consult a leather thickness guide before purchasing your material.
Pay attention to the surface condition as well. Avoid areas with deep cuts, weak spots, or pronounced irregularities where stitching will be placed. Natural marks can add character, but structural defects near pocket openings or seam lines may affect durability.
If possible, test a small offcut before committing to the complete project. Cut a short edge, punch several stitching holes, and try the intended finishing method. This simple test can reveal whether the material is suitable for the tools and techniques you plan to use.
Tools and Materials You Will Need
A beginner does not need an extensive leatherworking setup to complete this wallet. The essential equipment should allow you to measure accurately, cut safely, hold the components together, prepare stitching holes, and finish the exposed edges.
The following tools and materials are sufficient for the construction described in this tutorial:
-
Leather: One piece for the back panel and two pieces for the pockets, with enough additional material for testing cuts and stitching.
-
Sharp craft knife or leather cutting knife: Used to cut straight edges and shape the components accurately.
-
Metal ruler: Provides a stable guide for measuring and cutting straight lines.
-
Scratch awl or suitable marking tool: Helps transfer pattern outlines and mark important construction points.
-
Stitching chisels or pricking irons: Establish evenly spaced holes for hand stitching.
-
Two blunt-tipped leather stitching needles: Required for the saddle stitch technique.
-
Waxed thread: Provides a suitable hand-stitching material with controlled handling characteristics.
-
Leather-compatible adhesive: Temporarily secures the components before stitching.
-
Sandpaper and an appropriate edge-finishing tool: Used to refine and finish exposed leather edges.
-
Cutting mat and suitable punching surface: Protect the workbench and support safe cutting and punching.
A non-marring mallet is also needed if your stitching chisels are designed to be struck. Always use a suitable punching board beneath the leather, rather than striking tools directly against a hard tabletop.
Several optional tools can improve convenience. A wing divider helps establish a consistent stitching line, an edge beveler removes sharp corners from suitable leather, and a wooden burnisher or slicker makes traditional edge finishing easier. A stitching pony can hold the wallet securely while leaving both hands available for sewing.
For a more detailed explanation of these tools and their functions, see Leather Crafting Tools for Beginners.
If you prefer working with a prepared project rather than sourcing every component individually, a diy leather wallet kit can be a convenient alternative. BeaverCraft offers leather crafting kits, including a wallet project. Check the specific kit's contents and instructions before starting, since its pattern and assembly sequence may differ from the design in this tutorial.
How to Make a Leather Wallet Step by Step

The most important principle in learning how to make a wallet out of leather is to work in a deliberate sequence. Accurate preparation makes the later stages considerably easier. A small cutting error can affect pocket alignment, while incorrectly positioned stitching holes may be difficult to correct without replacing a component.
Before starting, prepare a clean, stable work surface with sufficient lighting. Keep cutting tools sharp, work away from your hands, and avoid rushing through operations that cannot easily be reversed.
Step 1: Choose or Create a Wallet Pattern
A pattern defines the shape, dimensions, and position of every wallet component. It also establishes the seam locations and helps ensure that the finished pockets can accommodate standard cards without excessive stretching.
For this project, use three rectangular pieces: a back panel measuring 105 × 75 mm and two front pocket panels measuring 52.5 × 75 mm each. The two pocket panels will sit side by side on the backing. Their outer and bottom edges will be stitched, while the top edges and the vertical edges facing the centre will remain open.
These measurements are an illustrative starting pattern, not a tested universal template. Standard payment cards measure approximately 85.6 × 54 mm, so each card will sit horizontally inside its pocket, with part of its length extending toward the centre. The pocket opening must be checked carefully to ensure that the card can slide in and out without excessive force.
For a more refined design, you can slightly lower or angle the inner upper corners of the pockets to improve access to the cards. However, keep the first version rectangular if you want to practise straight cutting and consistent seams.
If you are researching how to make a leather wallet pattern, begin by drawing the components on paper or thin cardboard at full scale. Use a ruler to establish straight lines and mark the intended stitching positions. Then cut out the paper pieces and arrange them exactly as they will appear in the finished wallet.
A step by step diy wallet template should show not only the external outlines but also the pocket openings, overlap areas, and stitching lines. These details prevent confusion during assembly and make it easier to check whether the design is practical.
Test the paper version with an actual payment card. Confirm that the card fits the intended pocket arrangement and that sufficient material remains outside the stitching line. Remember that paper does not reproduce the thickness or stiffness of leather, so this test verifies geometry rather than final pocket tension.
Once you are satisfied with the layout, transfer the final measurements to sturdy cardstock. A reusable template makes the cutting stage more reliable and allows you to reproduce the same design later.
Step 2: Transfer the Pattern to the Leather
Place the leather on your work surface with the finished side facing upward. Examine the material before positioning the pattern. Look for scratches, loose areas, significant thickness variations, or other imperfections that could affect the appearance or strength of the wallet.
Arrange the back panel first, since it is the largest component and forms the visible rear surface. Position the smaller pocket templates nearby, leaving enough space between outlines for accurate cutting.
Leather does not behave exactly like woven fabric, but different areas of a hide can vary in stretch and firmness. Whenever possible, choose relatively stable sections for pocket openings and stitching areas. Avoid placing critical seams across noticeably weak or excessively stretchy regions.
Hold each template firmly and trace its outline with a fine marking tool. Use light pressure, particularly on finished leather that can retain permanent scratches. Mark on the flesh side where practical, but remember to reverse the pattern if necessary so that the final pieces face the correct direction.
Check the measurements again before cutting. Both pocket pieces should have matching dimensions, and the combined layout should correspond to the back panel. Even a small discrepancy may become noticeable when the edges are aligned.
Step 3: Cut Out the Leather Pieces
Accurate cutting has a direct effect on the appearance and assembly of the wallet. Straight, square edges are easier to align, glue, and finish than irregular cuts. They also help maintain consistent distances between the seam and the outside edge.
Place the leather on a cutting mat and position a metal ruler along the first straight line. Hold the ruler securely with your fingers away from the cutting path. Use a sharp knife and draw it along the ruler with controlled pressure.
For thicker or firmer leather, several light passes may be safer and more accurate than forcing the blade through the material in a single movement. Keep the knife upright to avoid creating beveled cuts where a square edge is required.
Cut the back panel first, then the two pocket pieces. If the pattern includes rounded corners, use a suitable round punch or make several carefully controlled cuts rather than attempting to create the entire curve with one uncontrolled movement.
After cutting, place the components together without adhesive. The two front panels should align with the outer edges of the backing, and their inner edges should meet near the centre without overlapping. Check that both pockets have matching heights and that the wallet remains symmetrical.
If a piece is slightly oversized, trim it carefully. If a component is too small or significantly uneven, cutting a replacement is often preferable to adjusting the entire wallet around the mistake.
Step 4: Prepare and Finish the Edges
Some edges become difficult to access after the wallet is assembled. For this design, the upper and inner edges of both pockets should be prepared before gluing because they will remain exposed and form the openings through which cards are inserted.
Start by examining the cut edges. If they are uneven or contain loose fibers, smooth them gently with suitable sandpaper. Work progressively and avoid removing so much material that the pocket dimensions change noticeably.
For firm vegetable-tanned leather, an appropriately sized edge beveler can remove the sharp corners along exposed edges. A light bevel is generally sufficient for thin wallet leather. Aggressive beveling may remove too much material or create an irregular profile.
Next, use a finishing method compatible with the leather. Vegetable-tanned leather with suitable edge characteristics can often be burnished using a small amount of water or an appropriate burnishing compound. Rub the edge with a wooden slicker or suitable cloth until the fibers become compact and the surface appears smoother.
Soft chrome-tanned leather may not respond well to traditional burnishing. Depending on its finish, a carefully applied edge paint or another suitable edge treatment may produce better results.
Allow the prepared edges to dry fully before assembly. Do not finish the outer and bottom edges completely at this stage, because those edges will be refined together after the pocket panels are attached to the backing.
Step 5: Glue and Align the Wallet Pieces
Adhesive is used primarily to hold the components in their correct positions while the stitching holes are prepared and the seams are sewn. In this construction, the stitches provide the principal mechanical connection between the pocket panels and the backing.
Begin by placing the back panel flat on the work surface. Position the two pockets on top, aligning their outer and bottom edges with the corresponding edges of the backing. Check the centre opening and confirm that both pocket panels sit evenly.
Apply a thin, controlled amount of leather-compatible adhesive only along the areas that will be stitched. Avoid spreading glue into the pocket interiors, since this can reduce the usable space or accidentally bond the pockets shut.
Follow the adhesive manufacturer's instructions regarding application, ventilation, drying time, and pressure. Some leather adhesives require a short waiting period before the surfaces are joined, while others are designed for a different application method.
Once the adhesive reaches the appropriate stage, align the pieces carefully and press the bonded areas together. Work from one end toward the other to minimize shifting. If the adhesive permits repositioning, correct any visible misalignment before it sets.
Check the pocket openings with a card or a thin piece of cardboard after the adhesive has set sufficiently. The card should enter the intended compartment without encountering glue along the interior surfaces.
Do not begin punching until the layers are securely positioned. Even minor movement between the components can cause the stitching holes to become misaligned.
Step 6: Mark and Punch the Stitching Holes
Consistent hole placement is essential for an even seam. A straight stitching line improves the appearance of the wallet and helps prevent the stitches from wandering too close to the edge.
For this project, a stitching line approximately 3-4 mm from the outer edge is a practical starting point, provided the leather and chosen thread are suitable. A stitch spacing of approximately 3-4 mm can work well for a small wallet, although the final choice depends on the size of the stitching chisels and the desired appearance.
Mark the stitching lines along the left outer edge and bottom of the left pocket, then along the bottom and right outer edge of the right pocket. Leave the top edges and the two inner vertical edges unstitched so that the compartments remain accessible.
At the lower corners, plan the hole positions carefully. Avoid placing holes so close together that the leather between them becomes weak. You may need to adjust the spacing slightly near the corner rather than forcing the standard pitch into an unsuitable distance.
Place the wallet on a suitable punching board and hold the stitching chisel perpendicular to the leather surface. Strike it with an appropriate mallet, using controlled force. The teeth should pass through all intended layers without excessive damage to the surrounding material.
When advancing along a straight line, place one or more teeth into previously punched holes to maintain the spacing. Make sure the tool remains aligned with the marked seam rather than gradually drifting toward the edge.
Inspect both sides of the wallet after punching. The holes should emerge in the intended positions on the back panel. If the tool does not pass completely through the leather, carefully complete the openings with an appropriate awl rather than forcing a needle through partially formed holes.
Step 7: Hand Stitch the Wallet
Saddle stitching is a widely used technique for hand-sewn leather goods. It uses two needles attached to opposite ends of a single thread, with both needles passing through each stitching hole from opposite sides. The resulting seam is well suited to small leather accessories because it creates a secure connection without requiring a sewing machine.
For this wallet, prepare a length of waxed thread appropriate for the seam. A common starting estimate is approximately three to four times the seam length, with additional allowance for handling and securing the ends. The exact amount depends on leather thickness, stitch spacing, and the stitching method.
Thread one needle onto each end and secure the thread to the needles using your preferred leatherworking method. Begin at one end of the seam and pass the first needle through the initial hole until the thread is centred.
Pass one needle through the next hole, then bring the second needle through the same hole from the opposite side. Keep the thread clear of the needle points to avoid piercing it accidentally. Pull both ends until the stitch settles neatly against the leather.
Continue along the seam, repeating the same sequence at every hole. Maintain consistent needle orientation and thread placement. This helps the stitches form a regular pattern on both sides of the wallet.
Apply enough tension to bring the layers together without compressing or distorting the leather. Excessive force can create puckering, especially when working with relatively thin pocket material.
At the end of the seam, backstitch through two or three existing holes where practical to secure the thread. Trim the ends carefully and finish them according to the thread material. Avoid using heat near the leather unless the thread type and finishing method specifically require it and you can control the process safely.
Repeat the procedure for the second pocket seam. Before moving on, inspect the stitching on both sides and confirm that the pockets remain open and correctly aligned.
Step 8: Trim and Burnish the Final Edges
After stitching, the outer edges may show small differences between the back panel and the attached pockets. This is normal, particularly when the components were cut separately and joined by hand.
Inspect the combined edges and identify any areas where one layer extends slightly beyond another. If necessary, trim very small amounts of excess leather using a sharp knife and a stable cutting surface. Avoid cutting close to the stitching or removing material that supports the seam.
Once the edges are aligned, begin smoothing them with sandpaper. Work gradually, using controlled strokes that follow the edge profile. The objective is to create a continuous surface across the joined layers without rounding the wallet excessively or exposing the stitching holes.
For suitable vegetable-tanned leather, lightly bevel the outer corners if required and apply an appropriate burnishing medium. Use a slicker or burnishing cloth to compact the fibers and develop a smooth finish.
If the leather does not burnish effectively, consider an edge-finishing product designed for that material. Edge paint, for example, generally requires careful preparation and thin applications according to the manufacturer's instructions.
Pay particular attention to the lower corners, where the pocket layers meet the backing. These areas are often visually prominent and can reveal uneven cutting or inadequate sanding.
Allow the finished edges to dry or cure fully before handling the wallet extensively. A carefully prepared edge can significantly improve the appearance of even a simple beginner project.
Step 9: Inspect and Finish Your Wallet
The final stage is a functional and visual inspection. Before putting the wallet into everyday use, check that the seams are secure, the pocket openings are accessible, and the leather has not been damaged during assembly.
Examine both sides under good lighting. Look for loose thread ends, missed stitching holes, uneven edges, adhesive residue, or areas where the layers have shifted. Small imperfections may be corrected carefully, but avoid aggressive trimming or sanding that could weaken the finished construction.
Insert a standard payment card into each pocket. The cards should fit securely without requiring excessive force. Some firm leather may relax slightly with use, but the wallet should not depend on significant stretching to accommodate its intended contents.
Check that the cards can be removed comfortably and that the stitching does not interfere with their movement. If the pockets feel excessively tight, review the pattern dimensions and seam positions before attempting to stretch the leather.
Depending on the leather type, you may choose to apply a suitable conditioning or finishing product. Some prefinished leathers require no additional treatment. Always test unfamiliar products on an offcut and follow the manufacturer's instructions.
Once any applied finish has dried or cured, your first handmade leather wallet is ready to use. The completed project provides a practical reference for evaluating your cutting accuracy, stitch consistency, and edge-finishing technique.
How to Hand Stitch a Leather Wallet Properly?

Good wallet stitching depends on preparation as much as sewing technique. Even an experienced leatherworker may struggle to produce a clean seam if the holes are irregular, the thread is unsuitable, or the components shift during assembly.
The most important factor is consistent hole spacing. Stitching chisels help establish a regular pitch, but they must be held at a consistent angle. If the tool tilts or changes direction, the stitching line may look straight on one side while becoming uneven on the other.
Thread selection also matters. Very thick thread can overwhelm a small wallet and create unnecessary bulk, while excessively thin thread may look disproportionate or be unsuitable for the seam. For many compact wallets, thread around 0.45-0.6 mm is a useful starting range, depending on the hole size and stitch spacing.
During saddle stitching, establish a repeatable sequence. Pass the first needle through the next hole, position the thread consistently, then pass the second needle from the opposite side. Keep the needles from piercing the thread already inside the hole.
Maintain even tension throughout the seam. Pulling the thread too tightly can distort the pocket edges, while loose stitches may leave visible gaps between the layers. The correct tension brings the materials together firmly without changing their intended shape.
A stitching pony can improve control, particularly when sewing longer seams. However, it is not essential for this small project. If stitching without one, support the wallet securely and avoid bending the leather excessively while handling the needles.
Finally, inspect both sides of the seam periodically. A stitch that looks acceptable from the front may be uneven on the reverse if the needle orientation changes. Correcting a problem after only a few stitches is easier than discovering it at the end of the seam.
How to Get Clean, Professional-Looking Edges?

Edge finishing is one of the details that separates a carefully constructed leather wallet from a rough practice piece. Even when the pattern and stitching are accurate, exposed edges can appear unfinished if they contain loose fibers, irregular cuts, or visible differences between layers.
The first requirement is alignment. Before sanding, make sure the joined pieces form a reasonably continuous edge. Minor irregularities can be corrected, but substantial differences usually indicate a cutting or assembly problem that should be addressed earlier in the process.
Next, smooth the edge using suitable abrasives. Begin with a grit appropriate for the condition of the cut and progress to finer abrasives as needed. Avoid using unnecessarily coarse sandpaper on thin wallet leather, since it can remove material quickly and create uneven corners.
Beveling can improve the appearance and feel of firm leather by removing sharp edge corners. However, not every leather type or wallet design benefits from beveling. Thin, soft materials may require minimal preparation, while layered vegetable-tanned leather often responds well to careful rounding and polishing.
Traditional burnishing works by smoothing and compacting suitable leather fibers through controlled friction, often with a small amount of water or an appropriate burnishing product. The result depends on the leather's structure, the preparation of the edge, and the finishing technique.
For softer leather or materials with edges that do not burnish cleanly, edge paint may be a better choice. It can create a more uniform appearance, but it requires proper surface preparation and sufficient drying or curing time between applications.
Do not assume that every leather edge should become glossy. A natural matte edge may be appropriate for certain designs, while a polished or painted edge may suit others. The goal is a clean, consistent finish that complements the material and construction.
Before treating the finished wallet, practise on offcuts from the same leather. This allows you to evaluate the result without risking damage to the completed project.
Common Mistakes When Making Your First Leather Wallet
Most beginner mistakes occur during preparation rather than the final stitching stage. Incorrect dimensions, poorly matched materials, or rushed assembly can create problems that become difficult to correct once the wallet is sewn together.
The following table explains common problems, their consequences, and practical ways to avoid them.
|
Common Mistake |
What Can Go Wrong |
How to Avoid It |
|
Using leather that is too thick |
The wallet becomes bulky, and the pockets may be difficult to use. |
Consider the combined thickness of overlapping layers before cutting. |
|
Working with an inaccurate pattern |
Cards may not fit, or the wallet may become asymmetrical. |
Test the design with paper and an actual card before transferring it to leather. |
|
Cutting with a dull blade |
Edges become irregular, and the leather may stretch or tear during cutting. |
Use a sharp blade, a stable surface, and controlled cutting passes. |
|
Leaving all edge finishing until the end |
Some pocket edges become difficult to reach after assembly. |
Finish exposed pocket openings before gluing and stitching. |
|
Misaligning the components |
Pockets become uneven, and the outer edges require excessive correction. |
Dry-fit every piece and check alignment before applying adhesive. |
|
Applying too much glue |
Adhesive may enter the pockets or stain the leather surface. |
Apply thin layers only where bonding is required. |
|
Punching irregular stitching holes |
The seam looks uneven and may approach the edge too closely. |
Mark the stitching line and maintain consistent tool positioning. |
|
Pulling the thread excessively tight |
The leather can pucker, and the pocket edges may become distorted. |
Use steady tension that closes the seam without compressing the material. |
|
Rushing the finishing process |
Edges may look rough, or finishing products may not cure correctly. |
Work gradually and respect the drying or curing instructions. |
One of the most effective ways to reduce these problems is to test unfamiliar operations on scrap leather. A short practice seam can reveal whether the stitching holes, thread, and needles work well together. A small edge-finishing sample can show whether the selected method is compatible with the material.
It is also important to distinguish cosmetic imperfections from structural problems. Slight variations in stitch appearance may be acceptable on a first project, but weak seams, damaged leather around holes, or pockets that cannot hold cards securely should be corrected before the wallet is used regularly.
Rather than trying to conceal every mistake, examine what caused it. This makes each completed wallet a useful learning experience and helps improve the next project.
How to Care for Your Handmade Leather Wallet?

Proper care helps preserve the appearance and function of a handmade wallet. Leather is a natural material that can change with use, exposure to moisture, friction, and environmental conditions. The appropriate maintenance routine depends on the tanning method and surface finish.
For everyday care, focus on preventing unnecessary damage rather than applying frequent treatments. The following practices are useful for many leather wallets:
-
Avoid prolonged exposure to water. If the wallet becomes wet, remove its contents and allow it to dry naturally at room temperature, away from direct heat.
-
Keep it away from excessive heat. Radiators, heaters, and prolonged exposure to strong sunlight may affect the leather's flexibility, color, or finish.
-
Clean the surface appropriately. Use a soft, dry cloth for routine dust removal and follow leather-specific cleaning guidance when deeper cleaning is necessary.
-
Do not overload the pockets. Forcing too many cards into a small compartment can stretch the leather and place unnecessary stress on the seams.
-
Use conditioning products selectively. Apply only products compatible with the specific leather and its finish, testing them on an inconspicuous area first.
Some vegetable-tanned leathers gradually develop a patina as they are handled and exposed to normal use. Other leathers have protective surface finishes that change less noticeably. Neither behavior automatically indicates better or worse quality; it reflects differences in material and treatment.
Inspect the stitching and edges occasionally, particularly if the wallet is used daily. Loose threads, damaged seams, or peeling edge finishes are easier to address when identified early.
A well-made wallet does not require complicated maintenance. Appropriate handling, moderate loading, and care suited to the leather type are generally more useful than applying unnecessary products.
Conclusion
Making your first leather wallet is a practical way to develop the fundamental skills of leatherworking. A simple three-piece construction introduces pattern preparation, accurate cutting, edge treatment, adhesive assembly, hole punching, saddle stitching, and final inspection without requiring advanced machinery or complicated techniques.
The most important lesson is that a successful handmade wallet depends on the relationship between its components. Leather thickness influences flexibility and pocket capacity, accurate cutting supports clean alignment, and carefully positioned stitching holes make hand sewing easier. Each stage contributes to the function and appearance of the finished accessory.
Your first wallet does not need to be perfect. Small imperfections can help you understand where to improve your technique, whether that means refining your pattern, maintaining steadier stitching tension, or spending more time preparing the edges. With practice, these skills become easier to apply to more advanced wallets and other leather accessories.
If you would like to begin with a prepared project, explore the BeaverCraft leather crafting kits and choose an option that matches your experience and preferred construction. A manageable first project is an effective way to build confidence and develop practical leatherworking skills.