Leatherworking is the craft of turning leather into useful or decorative objects through cutting, shaping, punching, stitching, tooling, and finishing. It can involve anything from making a simple key fob to constructing a wallet, belt, tool case, or knife sheath. Although experienced leatherworkers may eventually build extensive workshops, leatherworking for beginners does not require a large room full of specialized machines.
A small work surface, a manageable first project, suitable leather, and several essential hand tools are enough to start learning. The key is to understand how the material behaves and develop each skill gradually instead of trying to master every technique at once. This guide to leatherworking covers the basic materials, tools, techniques, and steps that can help turn a first piece of leather into a finished handmade object.
What Is Leatherworking?

Leatherworking, also called leathercraft, is the process of making objects from natural or manufactured leather materials. Depending on the project, a leatherworker may cut pieces to shape, punch holes, join parts with stitching or hardware, decorate the surface, smooth the edges, apply color, and add a protective finish.
The range of possible projects is broad. Leather can be used to make wallets, cardholders, belts, keychains, bags, notebook covers, knife sheaths, tool cases, bracelets, decorative panels, and many other objects. Some projects focus almost entirely on accurate cutting and stitching, while others introduce molding, stamping, carving, dyeing, or hardware installation.
This combination of function and creative freedom is one reason working with leather appeals to many hobbyists. A finished piece can serve a clear practical purpose while still giving the maker control over its dimensions, color, stitching, edge treatment, decoration, and overall character. Even two objects made from the same pattern can look different depending on the leather and finishing choices.
Leathercraft is also a craft that rewards precision. Small differences in a cut line, stitch position, or edge can affect how the final object looks and functions. For beginners, that makes even simple projects valuable practice.
Why Start Leatherworking?
One of the main attractions of leathercraft is the ability to make something tangible from relatively simple materials. Instead of buying a finished wallet, sheath, or case, you can understand how it is constructed and build it with your own hands. The process makes the finished object feel personal, even when it follows an existing pattern.
Leather is also an interesting material to learn because it responds directly to the way it is handled. Different leathers bend, stretch, compress, mark, and finish differently. Over time, working with leather for beginners becomes an exercise in understanding these properties rather than simply following instructions.
The craft can also help develop practical hand skills. Cutting accurately teaches control. Marking and punching encourage consistent spacing. Saddle stitching requires rhythm and even tension. Edge finishing rewards patience. Mistakes are often visible, which gives the maker useful feedback from one project to the next.
There is no need to buy every possible tool at the beginning. A small project may require only a cutting tool, ruler, marking tool, punching tool, needles, thread, and several basic finishing supplies. Beginners who prefer not to select each item separately can also start with leather craft kits built around a specific project.
The goal of leatherwork for beginners should not be to reproduce professional workshop methods immediately. It is better to complete a few manageable projects, understand why each tool is used, and expand the setup only when a new technique actually requires it.
Understanding Leather: Types and Characteristics

Choosing suitable leather is one of the most important early decisions because the material determines how easily the project can be cut, folded, stitched, shaped, and finished. A leather that works well for a soft pouch may be unsuitable for a structured belt or protective knife sheath.
Full-grain leather retains the natural outer grain surface of the hide with relatively little alteration. It may show natural marks and variations, and these characteristics become part of the finished piece. It is commonly selected for projects where durability and the natural appearance of the material matter.
Top-grain leather also comes from the outer part of the hide, but its surface is generally processed or corrected to create a more uniform appearance. The exact finish can vary widely, so beginners should evaluate the individual piece rather than choosing leather by label alone.
Vegetable-tanned leather describes a tanning method rather than a specific grade of hide. It is generally firm enough for techniques such as tooling, stamping, edge burnishing, and wet forming, which makes it a common material for structured leathercraft projects. Belts, cases, pouches, and knife sheaths are typical examples.
Chrome-tanned leather is often softer and more flexible. Depending on its thickness and finish, it can work well for bags, soft accessories, garments, linings, or projects that need to bend easily. Because different finishes react differently to dyes and edge treatments, it is important to test products on an offcut before treating the main piece.
Suede has a soft, fibrous surface and is commonly used when texture and flexibility are more important than a firm polished grain. It can be suitable for certain pouches, decorative elements, linings, and accessories, but it behaves differently from firm vegetable-tanned leather during cutting and edge finishing.
Thickness is just as important as the leather type. Thin leather can make a compact cardholder less bulky, while a belt or protective sheath generally needs material with enough body to hold its shape. Beginners should therefore choose leather according to the object they plan to build rather than assuming one type will work for every project.
Essential Leatherworking Tools for Beginners

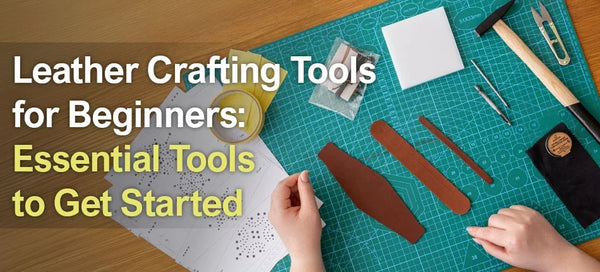
A first tool collection does not need to look like a professional leather workshop. Good leatherworking tools for beginners are the ones required for the project in front of you. Once you understand their functions, it becomes much easier to decide which additional tools are worth adding later.
A practical starter setup usually includes the following groups:
- Cutting tools. A sharp craft knife, utility knife, leather knife, or similar cutting tool is needed to cut patterns and trim pieces accurately. A cutting mat protects the work surface and helps provide a stable base.
- Measuring and marking tools. A metal ruler, square, dividers, scratch awl, or marking pen can be used to transfer patterns and establish cut lines, stitch lines, and hardware positions.
- Punching tools. Pricking irons, stitching chisels, awls, and hole punches create openings for thread, rivets, snaps, or other hardware. The correct tool depends on how the project will be assembled.
- Needles and thread. Hand leathercraft normally uses strong thread and blunt or leatherworking needles. Waxed thread is common because it is easy to control during hand stitching.
- Edge tools. Sandpaper, an edge beveler, slicker, or burnishing tool can help refine cut edges. Not every leather is finished in the same way, so the method should suit the material.
- Finishing supplies. Depending on the project, these may include leather dye, conditioner, edge treatment, protective finish, cloths, brushes, or applicators.
This is enough leathercrafting supplies to complete many small projects without investing in machinery. A hammer or mallet, adhesive, punches, hardware setters, stitching pony, and specialty knives can be added when the project genuinely calls for them.
Preassembled leatherworking kits for beginners can simplify this decision because the tools and materials are selected around a particular object. They are especially useful for someone who wants to experience the complete process before deciding which individual tools to buy separately.
Basic Leatherworking Techniques Every Beginner Should Learn
The first important skill is accurate cutting. Leather does not always forgive an uneven cut, especially along an exposed edge. Place the material on a suitable cutting surface, keep the pattern from moving, and make controlled passes rather than forcing the blade through thick material in one aggressive motion. A sharp blade usually gives cleaner results and requires less pressure than a dull one.
The next stage is preparing the pieces before assembly. This may involve marking stitch lines, determining overlap, locating folds, punching hardware holes, or lightly sanding areas that will later be finished. It is much easier to correct placement at this stage than after the parts have been glued or stitched together.
Punching consistent stitching holes is another basic skill. Pricking irons or stitching chisels can establish even spacing, while an awl may be used to open or complete holes depending on the construction method. The important point for a beginner is consistency: a straight, evenly spaced line of holes usually makes hand stitching easier and improves the appearance of the project.
Hand stitching is one of the defining techniques of traditional leathercraft. Saddle stitching uses two needles working from opposite sides of the same seam. Beginners should focus on keeping the thread tension consistent rather than pulling every stitch as tightly as possible. Excessive or uneven tension can distort the seam or the leather.
Edge finishing makes a major visual difference. Cut edges may be sanded, beveled, burnished, painted, or otherwise sealed depending on the leather and desired result. Several light passes generally offer better control than trying to correct a rough edge all at once.
Coloring and surface finishing should be approached cautiously on a first project. Leather dyes, creams, conditioners, and protective products can change color and surface appearance. Test them on scrap material whenever possible. Apply products in thin, controlled layers and follow the manufacturer's instructions for drying and curing.
These fundamentals are the foundation of a beginner leather craft practice. More advanced skills such as carving, stamping, molding, skiving, lining, complex hardware installation, and pattern development become easier once the basic process feels familiar.
How to Start Leatherworking: Step-by-Step Guide

Starting successfully is less about buying the largest tool set and more about choosing a project that teaches the right skills in a manageable sequence. A first project should be small enough to finish but complete enough to introduce measuring, cutting, assembly, stitching, and finishing.
Step 1: Choose Your First Leather Project
Look for an object with a small number of pieces and relatively straight construction. A keychain, simple cardholder, bracelet, basic pouch, or compact wallet is easier to understand than a complicated bag with several pockets, curved gussets, lining, and multiple types of hardware.
The best first project is not necessarily the smallest one. It should include enough steps to teach useful techniques without adding unnecessary complexity. A basic wallet, for example, introduces pattern placement, accurate cutting, stitching holes, hand sewing, and edge finishing in a practical format.
Beginners who want a predetermined project can use a wallet leather crafting kit rather than choosing every material and tool separately. This allows the first session to focus on learning the process instead of solving several purchasing decisions at the same time.
Step 2: Select the Right Leather and Tools
Once the project is chosen, match the material to its function. A slim cardholder requires different flexibility and thickness than a belt or knife sheath. Consider how much the piece needs to bend, whether it must hold its shape, whether exposed edges will be burnished, and whether the surface will be stamped, dyed, or molded.
Then choose the tools required by that particular construction. If the pattern uses hand stitching, you need a way to mark and punch consistent holes, suitable needles, and thread. If it includes snaps or rivets, the correct punches and setters will also be necessary. Avoid buying specialty tools simply because they appear in a general leathercraft equipment list.
Step 3: Create a Pattern and Prepare Materials
A pattern establishes the dimensions and position of every component before the leather is cut. Beginners can use a ready-made paper template or create a simple pattern from card stock. Check measurements and alignment before transferring the outline to the leather.
Arrange the pattern pieces carefully. Natural leather may contain variations, marks, or areas that behave differently, so inspect the material before deciding where each part will be cut. Mark holes, fold lines, hardware locations, and stitch lines while the pieces are still easy to handle.
If possible, make a quick paper version of a new design first. Folding and assembling paper pieces can reveal sizing or alignment problems without wasting leather.
Step 4: Cut, Assemble, and Finish Your Project
Cut each component with controlled strokes and check the pieces against the pattern before assembly. If adhesive is part of the construction, use the product according to its instructions and allow the required working or drying time instead of rushing directly into stitching.
Punch the stitch holes only after confirming that the parts line up correctly. Stitch with consistent tension and periodically check both sides of the seam. After assembly, trim or refine the edges, sand where needed, and complete the appropriate edge treatment.
The final stage is surface finishing. This may involve applying dye, conditioner, cream, wax, edge paint, or another finish appropriate for the chosen leather. Give the product enough time to dry or cure before putting the finished item into regular use.
Best Leather Projects for Beginners
Simple projects are useful because they let beginners repeat the same core operations without dealing with complicated construction. Each of the following options can teach a slightly different combination of skills:
- Keychains. A small project for practicing measuring, straight cutting, hole punching, edge treatment, and simple hardware installation.
- Cardholders and wallets. Good for developing cutting accuracy, seam placement, hand stitching, and neat edge finishing. A basic cardholder with only a few layers is usually easier than a multi-pocket wallet.
- Bracelets. Useful for learning accurate sizing, decorative punching, simple hardware, braiding, or surface treatment without using large amounts of material.
- Knife sheaths. A particularly relevant project for woodcarvers and knife users because it combines pattern making, stronger leather, stitching, edge work, and practical tool protection. Existing leather knife sheaths can also help beginners study how finished protective cases are shaped and constructed.
- Tool cases. A simple sleeve or cover for a small hand tool can introduce the same basic ideas as sheath making while allowing the design to be adapted to a specific tool.
For BeaverCraft readers, a knife sheath is an especially logical project to work toward. Someone who already uses carving or bushcraft knives can apply leathercraft skills to something directly connected with an existing hobby. It also shows why leatherworking is practical: the project is not only an exercise, but a finished object with a clear function.
Common Leatherworking Mistakes Beginners Should Avoid
Choosing leather only by appearance. A color or surface texture may look perfect while the thickness or flexibility is wrong for the project. This can make folding difficult, create unnecessary bulk, or leave a structured item too soft. Choose the material according to function first and appearance second.
Cutting with a dull blade. A dull tool can drag, wander away from the guide, or require excessive force. Replace, sharpen, or maintain cutting edges before accuracy starts to suffer. Always work on a stable cutting surface and keep hands away from the cutting path.
Rushing the pattern and layout. Small measurement errors can multiply when several pieces must align. Before cutting, verify dimensions, symmetry, hole positions, and the orientation of every component.
Trying to cut thick leather in one forced pass. Heavy pressure can reduce control. Several deliberate passes along the same guide may produce a cleaner result, depending on the material and tool being used.
Punching before checking alignment. Once holes are made, their position cannot simply be moved. Assemble or temporarily hold the parts in place first, then confirm that stitch lines and edges match before punching.
Rushing adhesive or stitching. Some adhesives need time before pieces are joined, while others need curing time afterward. Starting the next stage too soon can allow parts to shift. During stitching, speed can also lead to uneven tension or missed holes.
Ignoring test pieces. Dyes, conditioners, edge treatments, and finishes can look different once they touch the actual leather. Testing on an offcut makes it possible to check color, absorption, drying, and surface changes before committing to the finished item.
Skipping the finishing stage. An object may be technically assembled but still look unfinished if the edges are rough or the surface treatment is incomplete. Careful final sanding, edge work, cleaning, and an appropriate protective treatment can significantly improve the result.
Storing leather poorly. Excessive heat, strong direct sunlight, moisture, or tight folding can alter the material before it is used. Store leather clean and dry, preferably flat or in a way that avoids permanent creasing.
The purpose of identifying these mistakes is not to make a first project perfect. It is to prevent avoidable problems that interfere with learning. Small irregularities are normal, and many of them become easier to control after only a few completed pieces.
How to Care for Leatherworking Tools and Materials
Cutting tools work best when they are clean and properly maintained. Remove adhesive residue and debris after use, protect cutting edges during storage, and avoid leaving sharp knives loose among other tools. Blades that can be sharpened should be maintained before they become excessively dull.
Leather itself can also be useful in tool maintenance. Stropping is commonly used as a finishing stage for knife edges, and BeaverCraft's guide to leather stropping explains how leather strops are used to refine and maintain cutting edges.
Punches, pricking irons, awls, and edge tools should be kept dry and stored so their working surfaces are not repeatedly knocked against harder objects. If a tool begins producing rough or inconsistent results, inspect the edge or point before assuming the leather is the problem.
Keep adhesives, dyes, conditioners, and finishing products closed when they are not in use and follow the storage instructions on their packaging. Do not mix finishing products without first checking compatibility, especially when working on a piece that has already been dyed or treated.
Leather materials should be protected from prolonged moisture, excessive heat, and strong sunlight. Flat pieces are best stored without sharp folds. Rolled material should not be compressed so tightly that it develops permanent marks. Before beginning a project, wipe away dust and inspect the surface so that imperfections can either be incorporated intentionally or avoided during pattern placement.
Good maintenance does not require a complicated routine. Clean tools after work, protect sharp edges, store supplies properly, and deal with dullness or surface damage before it affects the next project.
Conclusion
Leatherworking is a craft that can grow with the maker. A beginner can start with a few tools and a straightforward project, then gradually move into more advanced stitching, tooling, pattern making, molding, dyeing, and finishing techniques as experience develops.
The most useful approach is to learn one process at a time. Understand the leather before cutting it, prepare the pattern carefully, keep tools sharp, test finishes on scrap material, and give every stage enough time. A small, well-planned project teaches more than a complicated project that becomes frustrating halfway through.
You also do not need to build a complete workshop before discovering whether the craft suits you. Start simple, learn the fundamentals, and let each finished project show you what tools and techniques you want to explore next. BeaverCraft leather craft kits can provide a structured first step with the core materials and tools selected around a specific project, so you can focus on learning the craft itself.