
How to Paint Your Wood Carvings: Useful Tips for You
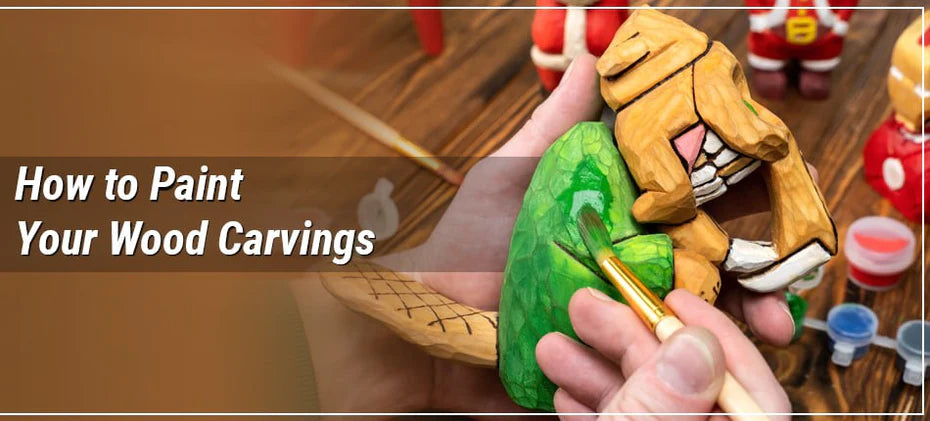
Look at your finished carving. You just put away your instruments and have some time to admire what you’ve made. The only thing that this precious thing lacks is some brightness of colour. If that’s your case and you’re here to find out the difference between paints, some rules for painting wood and get some answers to your questions on how to paint a wood carving art - sit back and keep reading. But before you do, make sure you only use the best wood for wood carving.
It’s very easy to damage your carving when it’s finished if you don’t know how to paint or seal it. The unfinished wood will dry and crack over time and the incorrectly applied paint will crack or flake. So don’t rush into experimenting without reading on the topic at least a little first, introduce yourself to the basic points of doing it right and then you’ll be happy with a great colorful result that you got. Don't forget that wood can be damaged before it's even painted, so BeaverCraft recommends that you read our guide «What Is the Softest Wood for Carving?»
So, how to not damage your wooden creation with paint? Are there limitations to kinds of paint? What kind of paint do you use on wood carvings? How do you seal wood carvings after painting and keep them safe for a long period of time? Well, we are going to cover all of these questions here.
What Materials Do You Need to Paint Woodcarvigns?
When transforming a raw piece of wood into a captivating work of art, the choice of materials becomes paramount. Painting woodcarvings is a journey that requires careful consideration of the tools at your disposal. From the texture of the wood's surface to the pigments that will breathe life into your creation, each element plays a crucial role in achieving your artistic vision. In this section, we delve into the essential materials that form the foundation of the woodcarving painting process. By understanding and harnessing the power of these materials, you'll be empowered to elevate your woodcarvings into vibrant and evocative masterpieces.

Materials You'll Need:
- Woodcarving
- Sandpaper (various grits)
- Primer (wood primer or gesso)
- Acrylic paints or wood stains
- Paintbrushes (various sizes)
- Water container (for acrylic paints)
- Palette or disposable palette paper
- Sealant or varnish (optional)
- Masking tape (for clean edges if needed)
- Rags or paper towels
With these materials at your disposal, you're well-equipped to embark on your woodcarving painting journey.
How To Paint Woodcarvings

That mostly depends on the size of your project and the goal you want to reach with painting, plus the effort you’re willing to make. What you need to remember before painting: always use a primer before applying the paint to the wood. It will help the paint sit more evenly and not fall into small cracks in the wood.
For small projects like «Comfort Bird» and easy application it’s the most reasonable option to use acrylic paints. There are a lot of colors and types of them, they are very easy to apply and they don’t need a lot of time to dry. They are also waterproof after drying so that’s a definite advantage. For bigger projects it’s the most convenient to use latex paints. They are quite similar to acrylics, but latex paints are sold in bigger quantities so it only makes sense to purchase more paint for more surface to cover with it. It also has a lot of different finishing options: gloss, semi-gloss, matte, satin, etc.
When you choose the primer for paint, look at the material which is in the basis of the paint that you chose. Grab a latex-based primer for latex paints and water-based or oil-based primers according to the paint type you want. For acrylics it’s common to use gesso.
Painting a Wood Carving Step-by-Step Guide

Embarking on the journey of painting woodcarvings is akin to breathing life into a silent masterpiece, infusing it with color, depth, and personality. The step-by-step process is a captivating dance between your creative vision and the transformation of a raw wooden canvas into a vibrant work of art. As you navigate through each meticulous phase, from preparing the surface to adding intricate details, you embark on a voyage of artistic expression that melds technique and imagination. In this section, we unveil the carefully choreographed steps that guide you in painting your woodcarvings, enabling you to imbue them with the essence of your creative spirit.
Prepare the Woodcarving
Ensure that your woodcarving is properly sanded and smooth. Use sandpaper to remove any rough spots and achieve the desired surface texture.
Apply Primer
Apply a layer of primer to your woodcarving. This helps create an even surface for the paint to adhere to and prevents the wood from soaking up too much paint. If you're using acrylic paints, you can use gesso as a primer.
Plan Your Design
Decide on the colors and design you want to paint on your woodcarving. You can sketch your design lightly with a pencil before you start painting.
Start with Base Colors
Begin with the base colors of your design. Use larger brushes for larger areas and smaller brushes for finer details. Acrylic paints are a popular choice for woodcarvings because they dry quickly and offer vibrant colors.
Layering and Blending
Acrylic paints allow for layering and blending. Start with lighter colors as the base and gradually build up darker colors and details. Use a dry brush technique for blending by lightly brushing over wet paint to create smooth transitions.
Add Details
As you progress, add finer details to your woodcarving. Use smaller brushes and take your time to achieve the desired level of detail.
Allow Drying Time
Acrylic paints dry relatively quickly, but it's essential to allow each layer to dry before adding another layer or working on a different part of the carving.
Seal or Varnish (Optional)
If you want to protect your painted woodcarving and give it a finished look, consider applying a sealant or varnish. This will help protect the paint and wood from wear, dust, and moisture. Make sure to choose a sealant that is compatible with acrylic paints.
Clean Edges (Optional)
If you want clean edges between different colors or sections, you can use masking tape to create sharp lines. Apply the tape before painting and remove it carefully once the paint is dry.
Final Touches
Review your painted woodcarving and make any final adjustments or touch-ups as needed. Step back and assess your work to ensure you're happy with the result.
Remember that practice makes perfect. Experiment with different techniques, color combinations, and levels of detail to develop your unique painting style for woodcarvings.
Oil for wood carvings

The next question you can ask after applying primers and paints is «What oil do you use for wood carvings?» And that would be the correct question. No carving should stay without a finishing layer or two of protection - if you want it to live for more than a year, of course.
Keep in mind that there are various types of finishings as there are for paints. You might want to stick to a chemical but stronger one or an oil weaker one, that is up to you. Of course, if you want to carve kitchen utensils, it won’t be a good idea to use chemical finishings. And it won’t be smart to do oil finish for a wooden sign that will stay under the sun and rain outside.
Stronger chemical finishes that are also called layered finish are a great choice if you are doing outside statues or big furniture pieces. This finish will protect your carving better but it has a few disadvantages. You can’t use it for spoons, bowls, etc. or you’re risking poisoning there. And it also takes quite a long time to dry. Consider the fact that you need to apply a few layers since that’s the reason why it’s called layered - and you’ll understand that it may take up to a few days. But it’s certainly worth it if you need a strong protection layer.
The more careful oil finish is great for kitchen utensils made of wood or any wooden carving that will stay inside as a decor element. It dries faster and isn’t poisonous, but it’s certainly not as strong so you have some things to compare. One of the most common oils for finish is linseed oil.
Hopefully this article has answered your questions about how to paint woodcarvings and seal them after. Happy carving and painting to you!
Painting Woodcarvings FAQ
What type of paint is best suited for woodcarvings?
Acrylic paints are a popular choice for woodcarvings due to their versatility, quick drying time, and vibrant color range. They adhere well to wood surfaces and can be layered, blended, and diluted to achieve various effects. Additionally, acrylic paints are water-based, making cleanup and mixing easier.
Should I use a primer before painting my woodcarvings?
Yes, using a primer before painting your woodcarvings is recommended. A wood primer or gesso creates a smooth and even surface, preventing the wood from absorbing too much paint and allowing colors to appear more vivid. Priming also helps the paint adhere better and promotes a longer-lasting finish.
How can I protect and preserve my painted woodcarvings?
To protect and preserve your painted woodcarvings, consider applying a sealant or varnish. These protective coatings shield the paint and wood from dust, moisture, and wear, enhancing the longevity of your artwork. Choose a sealant that is compatible with the type of paint you've used, whether it's acrylic or another medium, and follow the manufacturer's instructions for application.
Author:

Roman Law
Wood carving guruFrom a childhood enchanted by nature, my passion for wood carving guided me on a path of creativity. With a pocket knife, I uncovered the transformative power of my hands, breathing life into driftwood and forging a lifelong connection with the medium.