


Wood sculpture carving is one of the most expressive forms of woodworking. It combines artistic thinking, material knowledge, patience, and careful hand control. Unlike flat decorative work, a wooden sculpture has volume, movement, silhouette, and character. The carver does not simply decorate the surface but gradually reveals a three-dimensional form hidden within the wood.
For beginners, the material matters as much as the idea. A clean, stable blank can make the first project more predictable, while wood that is too hard, knotty, wet, or uneven may turn a simple design into a frustrating experience. That is why many carvers start with wood carving blocks made from approachable woods and study the basics of choosing the best wood for wood carving before moving on to larger or more complex sculpture projects.
This guide explains which woods work well for sculpture carving, how to think about design and project size, what general tool categories are commonly used, how long a wooden sculpture may take, and which beginner project ideas are realistic to start with. If you are new to the craft, it can also be useful to explore a broader wood carving for beginners guide and simple wood carving patterns for beginners before planning your first three-dimensional piece.
What Is Wood Sculpture Carving?
Wood sculpture carving is the process of shaping a piece of wood into a three-dimensional figure, object, abstract form, ornament, or decorative composition. The final piece may be realistic, stylized, minimalist, rustic, or highly detailed. Some sculptures focus on clean silhouettes and smooth surfaces, while others emphasize texture, movement, grain, and natural imperfections in the wood.
Compared with simple whittling or flat relief carving, sculpture carving requires more attention to proportions from several angles. The front view is not enough. A sculpture should also make sense from the side, from above, and sometimes from behind. This is why planning is important: the shape has to be imagined as a full object, not just as a drawing on one surface.
At the same time, sculpture carving does not always have to be advanced. A small bird, fish, mushroom, leaf, simple animal, abstract wave, or basic human face can be a manageable first project when the shape is clear and the wood is suitable. For additional beginner-friendly context, the BeaverCraft guide Into Wood Carving 101 can help readers understand the craft before choosing a sculpture project. The main goal for a beginner is not complexity but control, patience, and understanding how wood behaves.
Best Wood for Sculpture Carving

Choosing the right wood is one of the most important decisions in sculpture carving. A good carving wood should match the size of the project, the level of detail, the desired finish, and the carver’s experience. The same design can feel completely different when made from soft basswood, dense maple, expressive walnut, or resinous pine. If the reader is still comparing materials, BeaverCraft’s guide on which type of wood is best for beginners gives useful background before selecting a blank.
Softer woods are usually more forgiving. Basswood is especially popular because it has a fine texture, light color, and mild grain pattern. It allows the shape to stand out without strong grain lines competing with small details. For this reason, basswood for carving is often recommended for practice pieces, small figures, ornaments, and beginner sculpture projects. Readers who want a shorter material reference can also check the BeaverCraft glossary entry on basswood.
Butternut is another approachable option. It is generally soft, warm in color, and pleasant to carve for decorative work. Pine can also be used, especially for rustic sculpture or practice projects, although its resin content and grain variation may affect the surface. Aspen, alder, and similar woods may work well when the blank is clean, stable, and suited to the scale of the design.
Hardwoods such as oak, maple, cherry, and walnut can produce strong and visually rich results, but they are not always the easiest choice for a first sculpture. Their density, grain direction, and resistance require more precision, more patience, and better control. A deeper comparison of hardwood vs softwood can help readers understand why some species feel easier to shape while others are better suited for durable or advanced pieces.
The condition of the wood is just as important as the species. Properly dried wood is usually more stable and predictable. It is less likely to change shape after the sculpture is finished. Green or insufficiently dried wood may feel easier to shape at first, but it can shrink, warp, split, or develop cracks during drying. That does not make it unusable, but it does make it less predictable for beginners.
For sculpture carving, it is also useful to look at the blank before starting. Large knots, deep cracks, uneven drying marks, or twisted grain can interrupt the design. Sometimes these features can become part of the final character of the sculpture, but for a first project, a clean and consistent blank is usually easier to manage.
How to Choose a Wood Blank for a Sculpture
A sculpture blank should be large enough for the planned shape but not so large that the project becomes difficult to control. Beginners often make the mistake of starting too big. A large sculpture looks exciting in theory, but it takes more planning, more time, more physical effort, and a stronger understanding of proportions.
A smaller blank is usually better for learning. It allows the carver to understand the form, study the grain, and complete the project without losing focus. Small figures, simple animals, stylized faces, ornaments, and abstract forms can teach many of the same principles as larger sculptures while keeping the process manageable. For practice pieces and repeated experiments, a set such as BW18 basswood carving blocks can be a relevant choice because it provides several wood blocks for exploring different small ideas.
Proportion is another key factor. The blank should leave enough extra material around the planned object. If the design is too close to the edge, there may not be enough room for correction. A sculpture changes as it develops, and a little extra wood gives more flexibility during shaping and refining.
The direction of the grain affects both the appearance and the structural strength of the sculpture. Long, flowing forms often look better when the grain follows the direction of the shape. Thin details, narrow parts, or extended elements can become fragile if the grain direction works against them. This is especially important for animal legs, bird beaks, ears, tails, leaves, and similar details.
Surface quality also matters. A blank does not need to be perfect, but it should be suitable for the intended result. A rustic sculpture can make use of natural texture, while a polished decorative piece needs a cleaner starting point. The more refined the final idea, the more carefully the blank should be selected.
What Tools Are Commonly Used for Wood Sculpture Carving?

Wood sculpture carving can involve different tool categories depending on the size and style of the project. Small decorative sculptures may require only a limited set of hand tools, while larger works may involve broader shaping tools, sanding supplies, and finishing materials. The exact setup depends on the carver’s skill level, the wood species, and the final design.
Carving knives are often associated with shaping, trimming, and controlled detail work. Chisels are commonly used for removing material from broader areas or defining structural planes. Gouges help create curves, hollows, rounded forms, folds, and organic transitions. Sandpaper and finishing materials are used later to refine the surface and protect the final piece.
For safety, tool choice should match the user’s age, experience, supervision, and training. Sharp carving tools should be handled only in appropriate conditions, with proper protection and according to the manufacturer’s safety guidance. Beginners should focus on understanding the material, working slowly, and avoiding projects that require force, awkward hand positions, or unstable work surfaces.
Power tools may be used by experienced adults for larger projects, but they are not necessary for learning the fundamentals of wooden sculpture. For many beginners, handwork builds better awareness of grain direction, pressure, surface texture, and form. The slower pace can also make the creative process more thoughtful and controlled.
Safety and Project Planning Before You Start
Before beginning any sculpture carving project, it is worth thinking through the workspace, the blank, the scale, and the expected finish. Careful preparation does not make the process less creative. It makes the project more controlled and reduces the risk of mistakes, damaged material, or unsafe working habits.
The most useful preparation points are simple but important:
- Choose a stable, clean wood blank that suits the size and complexity of the project.
- Plan a simple shape first, especially if the sculpture is intended for practice or beginner learning.
- Use a safe, well-lit workspace where the blank can stay stable and distractions are limited.
- Wear appropriate protection and follow safety guidance for any tools or finishing materials being used.
- Work slowly and avoid forcing the material, especially when the grain changes direction or the wood feels resistant.
- Leave enough time for surface refinement and finishing instead of treating the final stage as an afterthought.
This planning stage is especially important for young beginners, family craft sessions, or classroom-style projects. In those cases, the safest approach is to use age-appropriate materials, avoid complicated shapes, and keep the focus on design, observation, sanding, painting, or finishing rather than difficult cutting work.
How Much Time Does It Take to Carve a Wooden Sculpture?

The time required for a wooden sculpture depends on several factors: the size of the blank, the hardness of the wood, the complexity of the form, the amount of detail, the surface finish, and the carver’s experience. There is no universal timeframe that fits every project.
A small and simple sculpture may be completed in a relatively short time, especially if the form is minimal and the finish is basic. A small bird, fish, mushroom, abstract ornament, or simple decorative figure can be a realistic beginner project. However, even a small object may take longer when the carver wants smooth transitions, balanced proportions, or a polished surface.
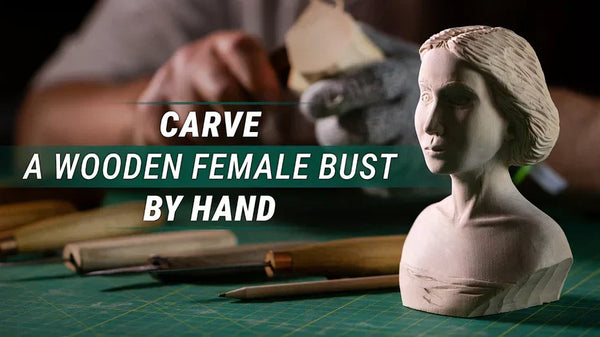
Larger sculptures require more time because they involve more design decisions. The carver has to consider the balance of the object, the relationship between major shapes, the strength of thin parts, and the visual rhythm. A large wooden figure, expressive animal, portrait-style bust, or complex abstract form may take days, weeks, or much longer depending on the level of refinement.
Finishing also adds time. Sanding, oiling, waxing, staining, painting, and drying between layers can extend the project beyond the shaping stage. This time is not wasted. A thoughtful finish can protect the sculpture, emphasize the grain, soften the surface, or create a stronger visual identity.
Sculpture Carving Process: From Concept to Finished Piece
Every wood sculpture begins with an idea. The idea can be detailed or very simple, but it should be clear enough to guide the project. A vague concept often leads to hesitation, while a defined shape helps the carver understand what should remain, what should be removed, and how the final object should look.
Choose a Realistic Concept
The best first concept is usually compact and readable. A simple animal, soft abstract shape, small decorative object, or stylized natural form is often more useful than an ambitious design with thin limbs, deep undercuts, or many fragile details. A realistic concept gives the carver room to learn without making the project unnecessarily difficult.
Study the Shape Before Working on Wood
A sculpture should be understood from multiple angles before the blank is shaped. Sketching the front, side, and top views can help reveal proportion problems early. For natural forms, reference photos or simple clay models may help the carver understand volume, posture, and balance. This stage is not about perfect drawing; it is about visual clarity.
Match the Blank to the Design

Once the design is clear, the blank should be checked again. The carver should consider whether the grain direction supports the shape, whether the size leaves enough extra material, and whether any natural marks in the wood will affect the finished sculpture. If a flaw sits in an important part of the design, it is better to adjust the concept before the work begins.
Build the Main Form First
The early stage of sculpture carving is about the main form rather than small details. The carver should think in terms of mass, silhouette, balance, and major planes. Details added too early can disappear as the form changes. A strong sculpture usually develops from large shapes to medium shapes and only then to smaller accents.
Define Character and Movement

When the basic form is established, the sculpture can begin to gain personality. Character may come from posture, curve, surface rhythm, facial expression, body proportion, texture, or the way the grain moves through the piece. Even a simple sculpture can feel expressive if the main lines are intentional.
Refine the Surface
Surface refinement depends on the style of the sculpture. Some pieces look best with visible tool marks and a handmade texture. Others need smoother transitions and a more polished appearance. The chosen finish should support the idea. A rustic animal, abstract form, or folk-style figure may benefit from texture, while a modern decorative sculpture may require a cleaner surface.
Sand When the Design Requires It

Sanding is not always necessary, but it can improve the feel and appearance of many wooden sculptures. It helps soften rough areas, prepare the surface for finishing, and make the object more pleasant to hold or display. The amount of sanding should match the design rather than automatically removing all handmade character.
Apply a Suitable Finish
The finish protects the sculpture and changes how the wood is perceived. Natural oil can deepen the color and reveal the grain. Wax can create a soft, pleasant surface. Stain can add depth or make the sculpture look more dramatic. Paint can turn the object into a colorful decorative piece. The best choice depends on whether the carver wants to highlight the wood itself or use the sculpture as a base for a more designed visual effect.
Simple Sculpture Carving Projects for Beginners

Beginner sculpture projects should be simple enough to finish but interesting enough to teach form and proportion. The goal is not to create a perfect object immediately. The goal is to understand how a three-dimensional shape develops and how wood influences every design decision. For inspiration, readers can explore DIY wood carving patterns and adapt the ideas to small sculpture projects.
Small animals are a good starting point because their silhouettes are easy to recognize. A bird can teach balance and soft curves. A fish can teach flowing lines and surface rhythm. A turtle, fox, owl, or small woodland figure can introduce simplified anatomy without requiring excessive detail.
Abstract forms are also useful for beginners. Spirals, waves, smooth stones, geometric shapes, and small decorative objects allow the carver to focus on proportion, surface, and silhouette without worrying about realistic anatomy. These projects are especially helpful for learning how light moves across a wooden surface.

A simple face can be another valuable learning project, but it should be approached in a stylized way. Instead of trying to create a realistic portrait, a beginner can focus on the relationship between the forehead, nose, cheeks, mouth, and chin. This teaches proportion and expression without demanding advanced detail work.
Common Mistakes in Wood Sculpture Carving
One common mistake is choosing wood that is too difficult for the project. Hard, unstable, knotty, or cracked material can make even a good idea hard to complete. Beginners usually learn more from a consistent blank than from fighting against complicated grain or hidden defects.
Another mistake is starting with a design that is too thin or fragile. Narrow legs, long ears, extended wings, delicate fingers, and thin tails may look attractive in a drawing but become weak in wood. A beginner sculpture should have compact, stable proportions. Strength matters as much as appearance.
Many beginners also focus on details too early. Eyes, feathers, fur, scales, folds, or decorative lines can be tempting, but they should come after the main form is resolved. If the basic shape is weak, small details will not fix it. A sculpture with simple surfaces and strong proportions often looks better than a highly detailed piece with poor structure.
Rushing the finish is another frequent issue. A sculpture can lose much of its quality if sanding, cleaning, or finishing is treated as a quick final step. Surface preparation affects how the final object looks, feels, and ages. Even a small project deserves a thoughtful finish.
How to Finish and Display a Wooden Sculpture
The final finish should support both the wood and the design. A natural finish works well when the grain, tone, and handmade surface are part of the sculpture’s character. Oil and wax can make the wood look warmer and more dimensional. A stained finish can create contrast, while paint can give the piece a decorative or storybook-like mood.
Before applying any finish, the surface should be clean and ready for the chosen result. A smooth sculpture may require more careful preparation, while a textured sculpture may only need light refinement. The finish should not hide the form unless that is part of the artistic idea.
Display conditions also matter. Wooden sculptures should be kept away from excessive moisture, direct heat, and unstable environmental conditions. Wood can respond to changes in humidity and temperature, especially if the piece is large, thin, or made from less stable material. A good display spot helps preserve the sculpture’s shape and surface over time.
Final Thoughts on Wood Sculpture Carving
Wood sculpture carving is a rewarding craft because it connects design, material, and handwork in a very direct way. Every blank has its own texture, grain, tone, and limitations. Learning to respect those qualities is part of the process.
For beginners, the best approach is to start with a simple design, choose a suitable wood blank, plan the shape from several angles, and work patiently through each stage. Basswood and other approachable woods can make the first projects more manageable, while more challenging hardwoods can be explored later as confidence grows. If the reader wants to compare dense materials before moving beyond softwood, BeaverCraft’s article on the hardest wood for carving can help set realistic expectations.
If you want a ready-to-carve starting point for practice figures, ornaments, and small sculpture ideas, explore BeaverCraft basswood carving blocks and choose a blank that fits your next project. A good piece of wood will not do the creative work for you, but it can make the process more predictable, safer, and more enjoyable from the first idea to the finished sculpture.


Thanks a lot!
Wonderfull and unique …. https://washingmachinemanuals.com/