

Welcome, wood enthusiasts, to the beautiful world of relief carving! Whether you're a seasoned woodworker looking to expand your horizons or a complete beginner eager to embrace this style of carving, you've landed in the right place. In this comprehensive guide, we'll delve into the depths (and heights) of relief carving, explore its various forms, tools, and techniques, and provide a solid foundation for beginners to start their relief carving journey.
What is Relief Carving?
Before we dive into the various styles, let's answer the fundamental question: what is relief carving? At its heart, relief carving is a wood carving technique that involves sculpting three-dimensional designs onto a flat surface, creating depth and texture that make the figures appear to stand out. It's like adding a splash of 3D magic to your two-dimensional canvas. But no worries, dear beginners – relief carving is a perfect entry point into the realm of wood carving.
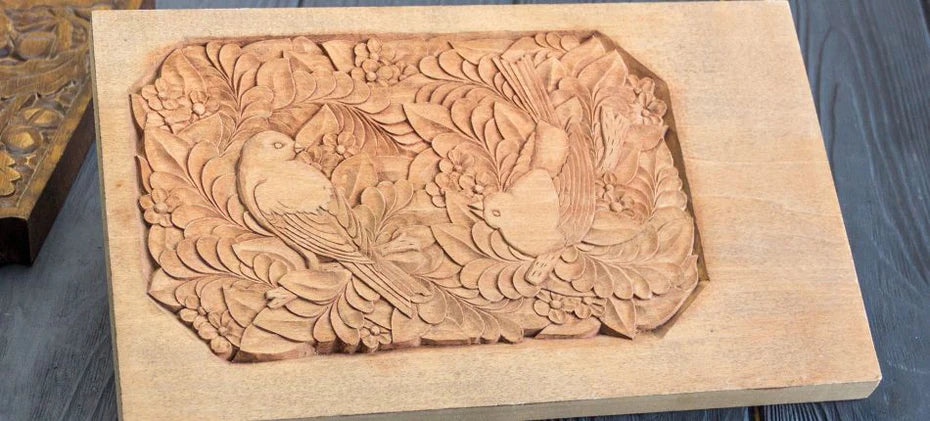
If you liked these birds, which were cut with relief technique, you will definitely be interested in the guide - «How to carve a comfort bird».
Types of Relief Carving
Now that we've grasped the essence of relief carving, let's venture further into the diverse relief carving styles, each with distinct character and allure.
Low Relief Carving
Low relief carving, often called bas-relief, is like creating a captivating story that gently emerges from a wooden canvas. In this style, the design is delicately carved into the wood, with the figures and elements only slightly raised from the surface. The carving remains shallow, creating a subtle interplay of light and shadow.
High Relief Carving
High relief carving takes the dimension to the next level. In this style, significant portions of the design rise boldly from the wood's surface, creating a striking and dramatic visual effect. It allows for greater sculptural detail, making it an ideal choice for those seeking to explore more dynamic visual depth.
Deep Relief Wood Carving
Deep relief wood carving casts a mesmerizing dance of shadows and contrasts. In this style, the carvings go beyond the surface, creating substantial depth that adds an extra layer of visual interest. Deep relief carving allows you to sculpt with shades, turning wood into a canvas of dynamic dimension.
Pierced Relief Carving
Pierced relief carving is akin to crafting delicate wooden lace. Instead of raising elements from the surface, this style involves creating intricate patterns and designs by carving away wood sections. The result is a captivating interplay of light and shadow, with negative spaces becoming as important as the carved elements.
Undercut Relief Carving
Undercut relief carving is all about creating an illusion of depth and perspective. In this style, carvers carve underneath and around the design elements, creating overhangs and recesses that add an intriguing sense of dimension. The resulting play of light and shadow gives the design a more pronounced depth, making it appear that the elements are emerging from within the wood.
Beginner's Tools for Relief Carving
As you make your first steps into relief carving, having the right wood carving tools is essential. These relief carving tools act as extensions of your creativity and allow you to transform wood blocks into dimensional masterpieces. So, let's arm you with the knowledge of essential tools for relief carving. If you are interested in the topic of different tools for beginners, read our guide - «Wood Carving Tools for Beginners».

Carving Knives
Carving knives are your primary instruments for intricate detailing and precision work. They come in various shapes and sizes, each designed to accomplish specific tasks. These knives are your go-to tools for creating fine lines, shaping delicate elements, and refining the contours of your relief wood carving.
Chisels
Wood carving chisels are essential for shaping and sculpting the overall form of your relief carving. They come in different profiles, each serving a particular purpose:
- Flat chisels are used for smoothing surfaces, shaping flat planes, and creating clean lines.
- U-profile chisels are perfect for hollowing out rounded areas and adding flowing curves to your design.
- V-profile chisels are ideal for creating sharp angles and intricate details.
Gouges
Gouges are curved tools that excel at creating depth, contours, and textures within your relief wood carving. They come in various sizes and sweep profiles:
- Shallow gouges are great for delicate details and creating subtle curves.
- Medium gouges are useful for carving broader curves and defining intricate patterns.
- Deep gouges are perfect for creating deep contours and bold sculptural elements.
Combining these tools allows you to layer depths, add textures, and bring your relief carving to life.

Best Wood for Relief Carving
Choosing the best wood for relief carving is akin to selecting the perfect canvas for a painting – it significantly influences the end result. The choice of relief carving wood determines the ease of carving, the texture of the finished piece, and the longevity of your creation. BeaverCraft has compiled all the information woodcarvers need to know about the best wood for wood carving. So, here's a closer look at some of the prime contenders and what sets them apart:
Basswood
A staple in carving, basswood is the go-to choice for many carvers, especially beginners. Its softness and fine, even grain makes it a breeze to work with. Carving intricate details and delicate curves is a joy on this forgiving wood, making it a top pick for those still honing their skills. For more information about this type of wood check our completed guide «Is Basswood Good for Carving?».

Butternut
Recognized for its light color and smooth texture, butternut is a favorite among carvers who appreciate its ease of use. Its workability and minimal grain interference make it an excellent option for those new to relief carving.
Cherry
With its warm reddish-brown hues, cherry wood adds a touch of sophistication to carvings. Its fine grain ensures that delicate details are beautifully captured, and its smooth texture is great for intricate designs.
Walnut
For those who crave contrast, the rich dark tones of walnut wood offer a striking backdrop to relief carvings. Despite being slightly harder, its durability and ability to showcase intricate details make it a favorite among experienced carvers. For more information about this type of wood check our completed guide «Is Walnut Wood Good for Carving?».
Maple
Moving into hardwood territory, maple is celebrated for its consistency and fine grain. While it can present more of a challenge due to its hardness, its rewards are well worth it.
Elm
Elm's unique interlocking grain pattern adds character to carvings. While it might pose some challenges due to its grain, it provides a distinctive texture that lends an air of rustic charm to your creations. For more information about this type of wood check our completed guide «Is Elm Good for Carving?».
How to do Relief Carving?
Now, let's dive into the actual process of creating a relief carving. Here's an in-depth look at each step, guiding you through the creation of your very own relief wood carving project:
Find or Draw a Pattern
You can explore online resources for patterns or sketch your own on paper if you're feeling adventurous.
Prepare the Wood
Choosing a suitable wood for relief carving is essential. Find a smooth, flat piece of wood free from knots, cracks, and irregularities.
Transfer the Pattern
Carefully trace the design onto the wood's surface using tracing paper or carbon paper. Alternatively, for those who prefer a different approach, you can also opt to glue the pattern onto the wood.
Remove Excess Material
Armed with your special tools for relief carving, it's time to trim away the excess wood around your design.

Outline the Desired Depth
Now, it's time to envision the layers of your design. Use different carving tools to establish the varying depths within your pattern.
Carve the Details
Begin carving, focusing on shallower areas and gradually working to the deeper parts. Visualize your design as you carve, allowing each cut to bring the details to life.

Sand the Project
As your design emerges, it's essential to smooth any rough edges or surfaces using sandpaper, ensuring a polished finish.
Apply Finishes
Seal your relief carving project with a finish that resonates with your artistic vision – varnish for a glossy sheen, wax for a subtle luster, or oil for a natural look. These finishes will safeguard your carving and add a layer of allure.
Relief Carving Patterns for Beginners
For those who are just stepping into the vastness of relief carving for beginners, selecting the right pattern is like choosing the foundation of your creative journey. The design you choose sets the tone for your exploration, guiding you through the intricacies of relief wood carving and helping you understand depth, contour, and the play of light and shadow.
Let's explore some beginner-friendly relief carving patterns that will ignite your creativity and help you gain confidence and skills.
Animal Silhouettes
Animal silhouettes are an excellent starting point for beginners. Whether it's a majestic eagle or a gentle deer, these silhouettes allow you to explore the contours and shapes that make each creature unique. The simplicity of silhouettes provides a solid foundation for mastering carving techniques while delivering impressive results. Dive into our completed guine «How to Carve a Wooden Eagle» if you are interested in carving animal silhouettes.

Geometric Patterns
Geometric patterns might seem like a departure from the natural world, but they offer a playground of creativity and precision for beginners. Think of intricate mazes, interlocking circles, or tessellated designs – these patterns challenge your carving skills and cultivate your ability to work with symmetry and details.

Beyond the basic relief carving ideas lies a ton of enchanting possibilities. Imagine carving abstract designs where fluid curves and bold angles spark emotions unique to each viewer. Or explore botanical beauty, replicating delicate leaves, intricate flowers, and even the textures of tree bark. The choice is yours!
Tips for Relief Carving Beginners
As you dive into the realm of relief wood carving for beginners, you'll discover a world of creativity and craftsmanship that's both accessible and endlessly rewarding. But before you roll up your sleeves and pick up those carving tools, consider the following tips to ensure a smooth and satisfying carving experience:
- Start with softwood to make your learning curve more forgiving.
- Understand grain direction – it affects carving ease and final appearance.
- Practice tool control to achieve the desired cuts and textures.
- Start with simple designs to build your skills before tackling more intricate relief carving ideas.
- Maintain sharp tools; they make carving safer, easier, and more enjoyable.
- Enjoy the process; let your creativity flow and your passion flourish.
With these insights and techniques, you're equipped with the knowledge and confidence on how to relief carving, transforming wood into intricate works of art that leap off the surface.
Now, take a deep breath, gather your tools, and let your imagination run wild as you shape wood into stunning projects. The world of relief carving is yours to explore!


Hi Cheri! So glad to hear you’re diving into relief carving — 9 months in is a great milestone! 😊
If you’re looking for tutorials or the pattern you lost, feel free to leave your email on our site here!
We’ll send you free PDFs and links to step-by-step videos right to your inbox. Let us know what kind of project it was — we might be able to match it!
I started relief carving about 9 months ago . I am looking for a tutorial . I have misplaced the pattern and instructions when I moved to Tennessee
Thank you